
|
The Society of Folk Dance Historians (SFDH)
How to Re-bag a Gajda
[
Home |
About |
Encyclopedia | CLICK AN IMAGE TO ENLARGE |

|
I've put new bags on my gajda a number of times and feel I have made the majority of the obvious mistakes. A while back David Hernston asked the EEFC list how to do it. I replied with a long email but resolved that the next time I rebagged a gajda I'd take pictures to illustrate the process, build a web page, and post it. This is the result.
P.S. These photos are from rebagging my Kaba Gajda so the bag is a bit bigger than the average Djura Gajda.
OVERVIEW
Putting on a new bag is about a three-day process. Tying it in takes a couple hours of intense work. Working the bag so it is flexible takes fifteen minutes every few hours until the bag is fully dry. If you don't allow yourself enough time it will end up with hard spots and a weird shape and you'll have to rewet it and start the drying cycle again. Be patient.
WHAT YOU NEED
- Salt tanned goat skin.
- Stocks
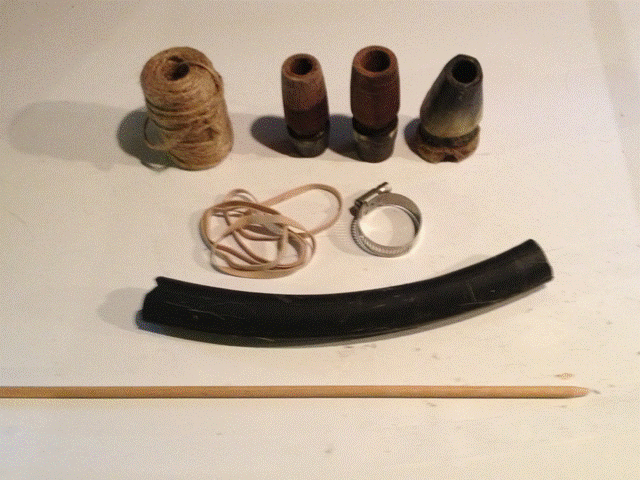
- About 8" of 1/4" wooden dowel.
- A roll of about 1/16" hard twine.
- Several wide (about 1/4") rubber bands.
- A 1 1/2" to 2" screw type stainless steel hose clamp.
- 8" or so of bicycle inner tube that will fit over the base of the chanter stock.
- Flat waterproof surface larger than the bag (I use a countertop).
- Sharp fabric scissors.
- A leather hole punch that is slightly smaller than the wooden dowel diameter.
- A flat blade screwdriver.
- Forceps or long nose pliers.
- An old pair of home electric barber shears is helpful.
TYING IN THE BAG
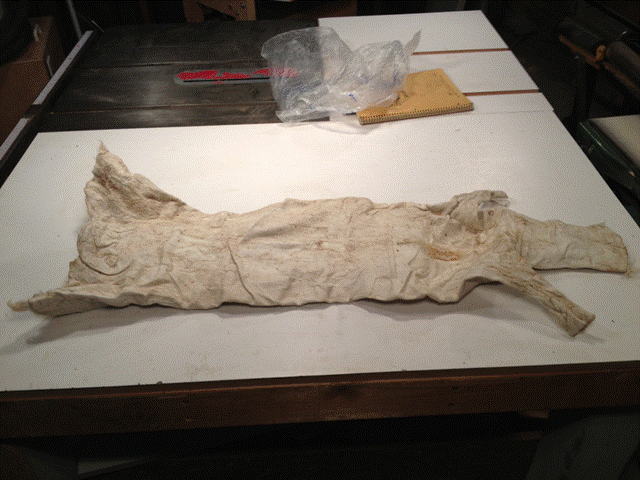
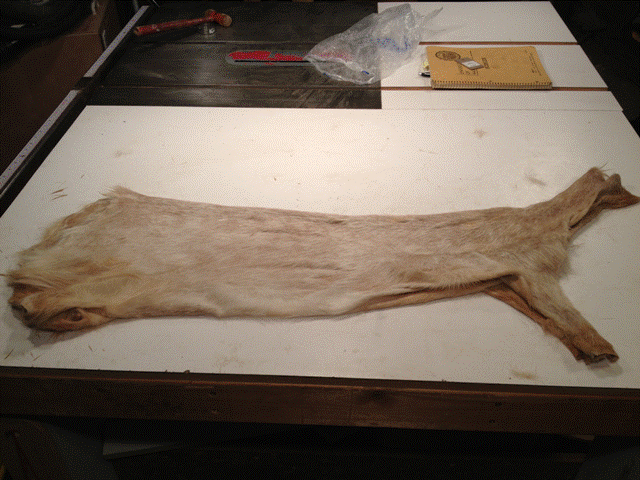
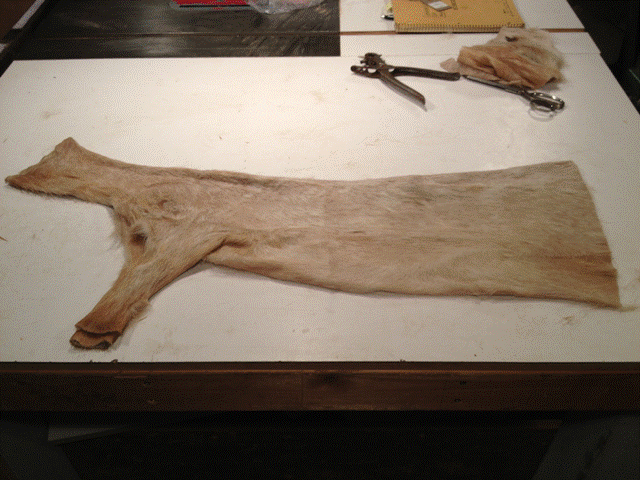
Usually the bags come with the hair on the inside, so starting from there.
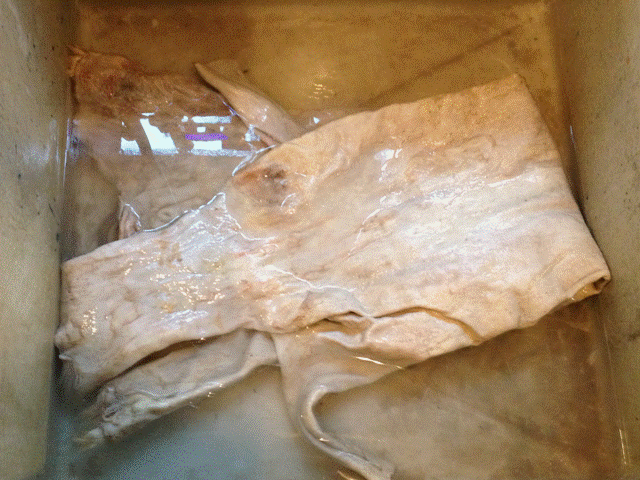
- Soak the bag in warm water until it is limp.
- Turn it right side (fur side) out.
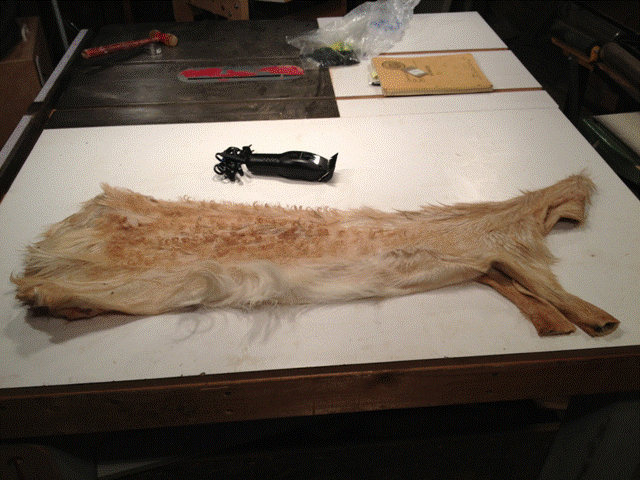
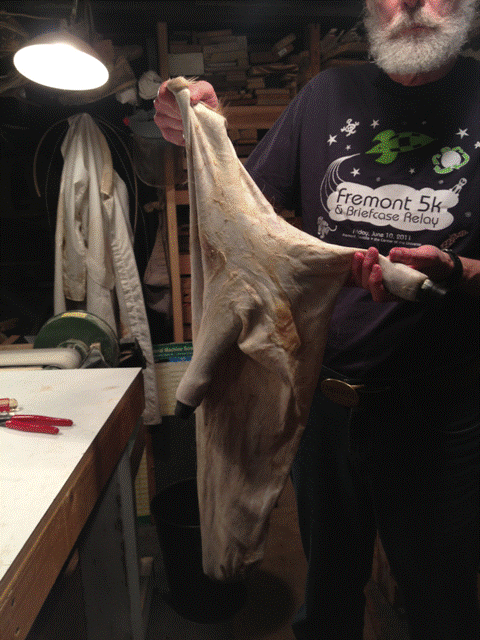
- Trim off most of the fur (I leave it about 1/4" long). If you are using scissors, be very careful between the legs, the skin is thin there and easy to nick. Alternatively use the electric shears (shown above) to take off the hair. It does a better job and is much less likely to puncture the skin.
- Lay the bag folded along the back bone on the counter top and cut off the butt end of the skin. I tend to go roughly at right angles to the back bone as close to the aft end as I can, but that depends on the skin. Save the skin you cut off in case you need to patch a hole in the skin later.
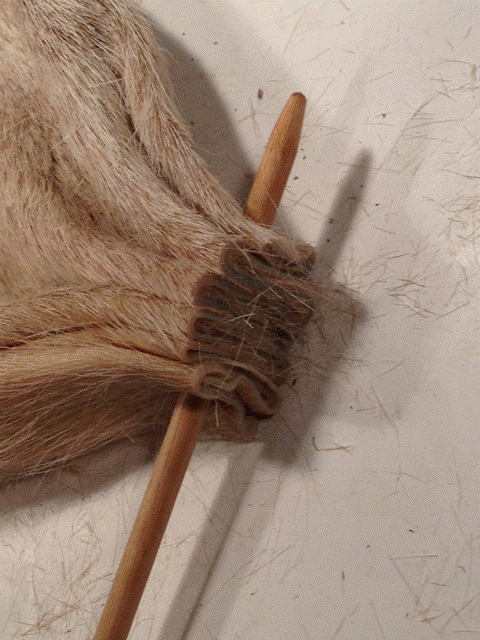
- Make sure the skin is still folded exactly on the backbone and lay it flat on the table. Starting from the backbone fold, use the leather punch to cut evenly spaced matching holes 1/2" to 1" in from the cut edge though both layers of the wet leather. Punch holes about every inch, starting and ending about 1/2" from the folded top and bottom edges. The even spacing and alignment of holes is fairly critical to getting a good seal on the bag, so be careful and don't let the layers slip against each other.
- Point the end of the wood dowel and weave it though the paired holes, folding as you go. You end up with an accordion pattern zigzag of both layers of skin.
- Squeeze the skin together tightly along the rod, adjusting the folds so they are smooth using the screwdriver and forceps to keep them neat.
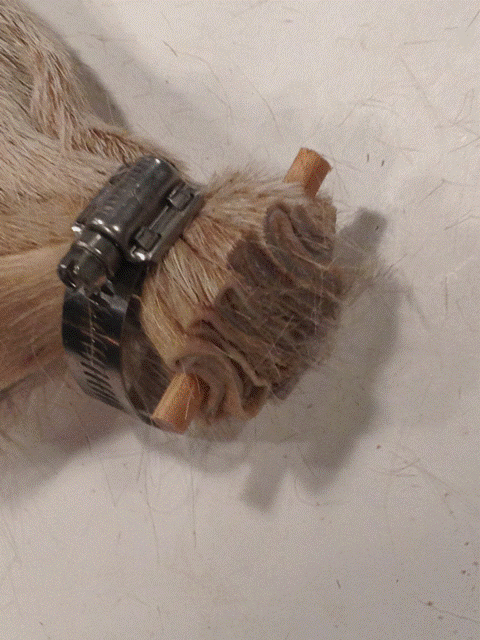
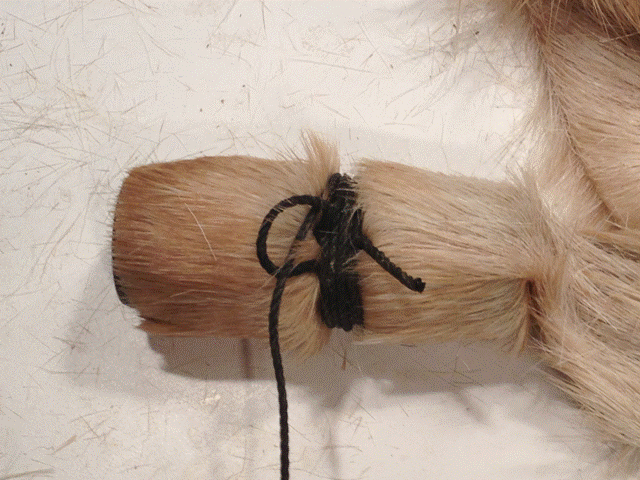
- Either wrap quite a bit of twine very tightly (if your hands don't hurt, you aren't tight enough) around the skin against the stick towards the head end of the skin. You can tie a loop in the end of the twine and put a dowel through it to get better leverage on the rope. Or you can put a stainless hose clamp around the skin at the same place and tighten it very tight. If you use twine, double or triple knot it because it is a real pain to have to retie it if it starts leaking. You have to resoak the skin and turn it inside out again.
- Trim off the dowel about 1/2" above and below the leather.
- Figure out which leg you want the blowpipe in (remembering that the bag is going to be turned inside out).
- Cut the ends of both legs square.
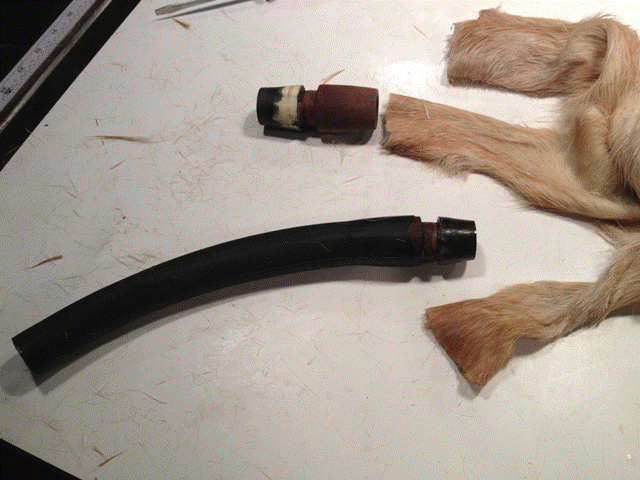
- Clean out the grooves on all three stocks where the skin is going to be tied. Often bits of the old bag and other stuff are stuck in the grooves. Make sure you have a clean surface to tie onto.
- Slide the bicycle inner tube up on the end of the blowpipe stock until it is just below where
the cord will tie the skin to the stock.
Note: The reason for the inner tube is to channel condensation from your breath out into the middle of the bag rather than have it wick around the blowpipe stock and soak into the bag. The damp eventually causes the bag to fail, but while it is easily fixed in the middle of the bag, if it fails around the stock it's time for a new bag. - Reach inside the skin and slide the blowpipe stock up the leg until its bottom end is even with the end of the skin. Now tie the stock in tightly like you did the end of the bag.
- Repeat for the drone fitting.
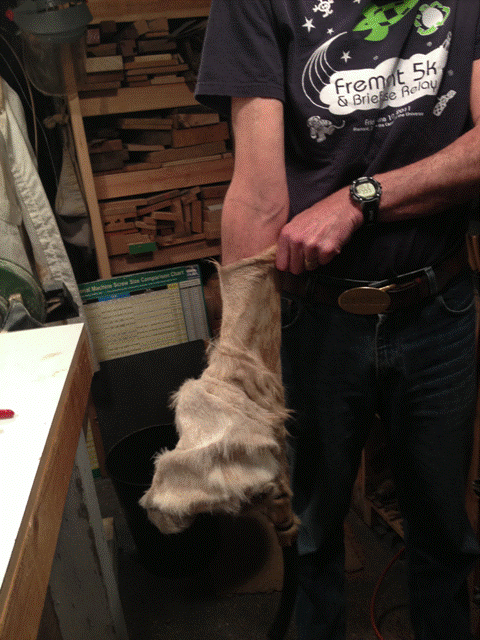
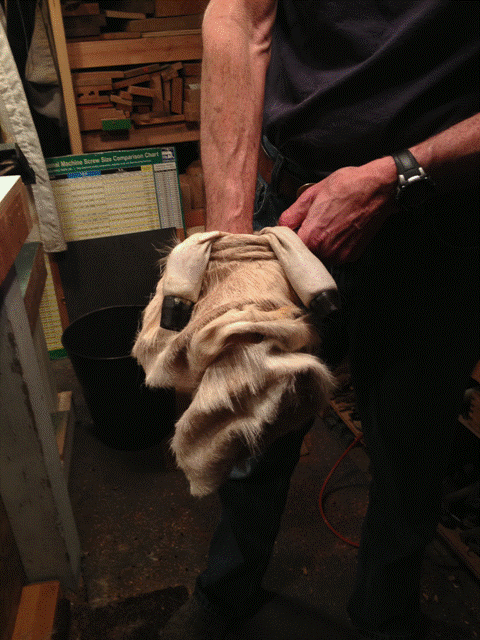
- If it has gotten stiff, re-wet the bag with warm water and turn it right side out through the neck hole.
- There are lots of ways of doing this. It depends on the skin which works best. I tend to work one leg all the way through, completely reversing it, before doing the other leg.
- Finally I reach into the bag, grab the bottom end and slide it through. This shouldn't take much effort, though it takes a while and is very slimy. If something binds, figure out what is going on and fix it.
- Decide what angle you want the chanter at and trim the neck accordingly. Vassil Bebelekov has been trimming them at a slight angle recently to prevent the chest part of the skin from cutting off the chanter air flow (so the oblique angle is at the backbone side of the bag and the obtuse angle is at the belly side). Seems to work quite well. I used about a 10 degree angle on my last bag and am pleased with it.
- Cut 3 or 4 of the 1/4" rubber bands crosswise to form 1/4" rubber strips and put them within easy reach.
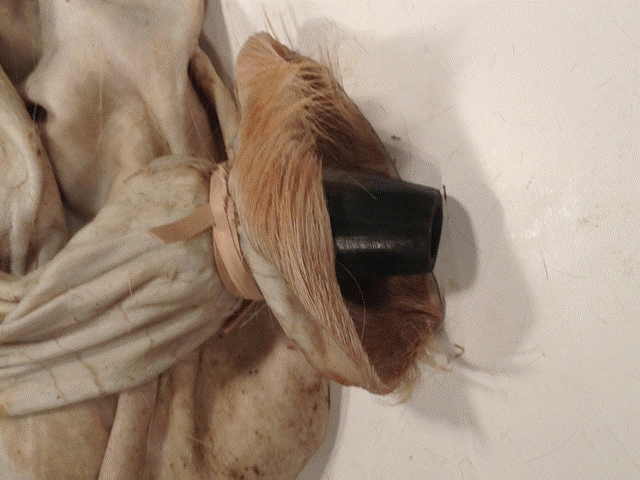
- Squeeze the bag neck down around the chanter stock and wrap a rubber strip around the tie-in area very tightly. Hold down the start of the strip with your thumb. Stretch the rubber strip as far as it will go, which is tricky because wet rubber is slippery. Wrap it around the chanter stock several times until you are about one wrap around from running out of rubber strip. Now stick a finger under the strip as it goes by and tuck the end under that loop to secure it as it comes around the next time.
- Put on a couple more rubber strips the same way.
- Use the forceps to even out the wrinkles and unfold the overlaps in the skin around the chanter stock until you have uniform ripples. This it tough and I usually lose it a couple times before it works.
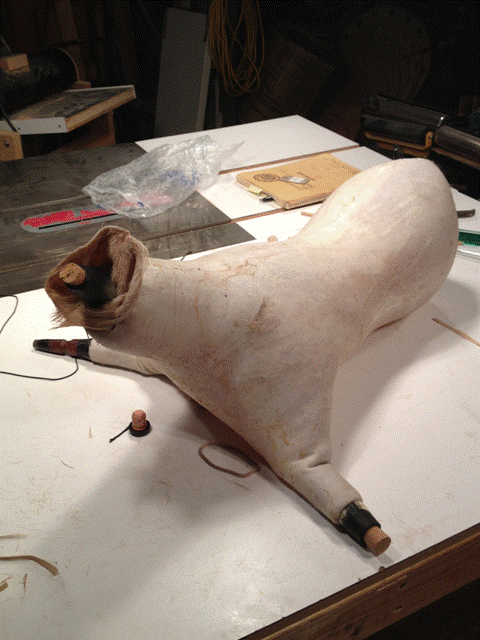
- Stop the drone and chanter stocks with corks and inflate the bag with the blow pipe.

STRETCHING THE BAG
Assuming the bag inflates and holds air, you're done with the easy part. Now comes the hard work of stretching the bag as it dries to make it soft, flexible, and as large as possible. Let the bag dry until it is no longer soggy. You want it damp but not slippery or squishy.
What you are doing in this step is, essentially, a buckskinning process. The skins used on gajdas are not tanned the way most leather is. Tanning is essentially a chemical cooking process and it changes the character of the leather. The skins for gajdas are defleshed and then salt cured which means their properties are much closer to what they had on the animal. Thus there is still a layer of connective tissue on the inside of the skin to keep the animal's skin tight. It stays soft and flexible because it is wet. As the bag dries, it contracts and gets hard. So you have to mechanically break it down by stretching the skin as it dries.
Start by stretching the bag all over by pulling on short sections around its circumference with both hands (same direction the goat expands when it breathes). Also stretch it at angles. Be particularly careful around the legs, it easy to end up with them stiff.

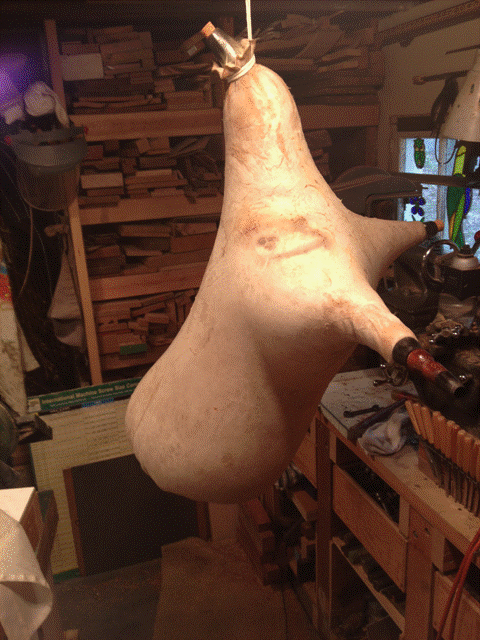
During this first all over stretch you'll learn the skin and notice where the hard and soft spots, and the thick and thin spots are (you hands are more useful than your eyes for this, pay attention to how the skin feels, not just how it looks). Inflate the bag, hang it by its neck from a rafter and let it dry for an hour or so. Now stretch it again, paying attention to the stiff spots.
You will soon get a sense of how fast the bag is drying. It's a lot quicker in the summer in San Jose than it is in the winter in Seattle. You want to stretch it whenever it starts to get stiff spots again. Often you can see them because the connective tissue is slightly darker that the skin so that when you stretch the skin you can see the connective tissue fragment and the lighter skin color show though the cracks. But this isn't 100% true, let your hands tell where the hard spots are.
One does need to sleep, so check the bag last thing at night and then first thing in the morning. You may need to damp it slightly with a spray bottle, either using straight water or the Vassil's gajda solvent discussed below.
With luck and a lot of hard work, at the end of 3-4 days you'll have a good bag that will last you for years.
COMMENTS
If you end up with a bag that is too hard or has hard spots, Vassil has developed a good wetting solution which is a mix of 1/2 baby oil and 1/2 rubbing alcohol. Put the mix in a spray bottle, damp the hard area, rub the solution in, let it sit a few minutes and start stretching / working the area. Works quite well but makes the bag slippery if you use too much.
Your hands will be trashed after mounting a bag. Don't expect to play much gajda for a few days. Usually takes my thumbs a week or so to stop aching.
If you find a leak (one of my previous bags had a couple thin spots near the breast bone that failed as soon as I blew up the bag) take some of the skin you cut off, shave off the fur, cut a patch to cover the hole plus about a 1/2" margin, glue the flesh side to the outside of the bag (general rule: glue like sides together – skin to skin, flesh to flesh – this also applies when fixing skin drum heads). I use Barge Cement. It has been recently reformulated to comply with California solvent rules so it is a lot harder to get to stick properly, but if you burnish it down hard it will work.
Used with permission of the author.
This page © 2018 by Ron Houston.
Please do not copy any part of this page without including this copyright notice.
Please do not copy small portions out of context.
Please do not copy large portions without permission from Ron Houston.